Showing posts with label Recipe. Show all posts

Saturday, November 28, 2015

A Year of Pies Book Review

13584657
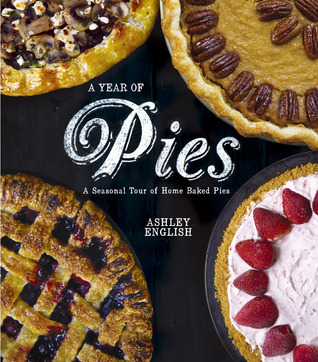
Title: A Year of Pies

Author: Ashley English

Genre: Nonfiction, Cookbook, Seasonal, Pies

Plot: I discovered this delicious book at a local library this past summer and checked it out again to prepare for Thanksgiving, even though I don't usually make the pies. Still, who could pass up the wonderful recipes contained in this slim attractive volume?

This beautifully laid out book is divided into five categories - the pre-baking stuff about equipment you're need and the standard pie crusts, Spring, Summer, Autumn and Winter. Each seasonal section features the fruits and vegetables in season and which you then turn into delectable pies and tarts. Each recipe is accompanied by a lovely picture and very clear easy to follow instructions. Several recipes caught my eye and made me drool just thinking about them: a yummy rich Chocolate, Coffee and Orange Marmalade Tart begs to enjoyed with deep delight, a Buttered Rum Shoofly Pie would look stunning on a holiday table, the Minty Chocolate Cream Pie would go along nicely with a dab of whipped cream or ice cream, and the Cherry Vanilla Pot Pie might soon become my favorite pie I haven't yet made but am dying to do so. The unique thing about this cookbook is that there are also "dinner" pies; classic Chicken Pot Pie, a yummy sounding Spiced Meat Pie and several vegetable-based tarts that sound divine. I can't wait to dive in!

Likes/Dislikes: Every pie looks so good, even the guests recipes, that it really is hard to pick just one to try out. Luckily, my sister wasn't so baffled and tried the Brandy and Spiced Apple Hand Pies. Based on how fast my brothers devoured them, we can safely assume the recipe was a hit. I fully intend to purchase this cookbook {when I have money again} and make every single yummy sounding pie, starting with either the Spiced Meat Pie or the Cherry Vanilla Pot Pie. When I do, I'll post about it for you all.

Rating: G - all ages. Highly recommended!


Date Review Written: November 12th, 2015

Saturday, June 6, 2015

Supermarket Healthy Book Review

Title: Supermarket Healthy

Author: Melissa D’Arabian

Genre: Cookbook, Health Food, Modern, Celebrity Author

Plot: With healthy eating a popular trend right now, you’d think there would be a simple inexpensive way to serve healthy meals for your family. But with tight budgets and picky eaters, this can be tricky for any mom or dad. This is where Supermarket Healthy comes in handy. There are tons of easy to follow recipes in this book that lay out a good basic groundwork for how to serve healthy meals to your family. With a section on breakfast, lunch, snacks, beef, poultry, vegetarian and dessert, there’s something in here for everyone. There are also tips for converting regular recipes into gluten-free and vegetarian, tips for long-term storage and time-savers in the kitchen.

So grab your appetite and get ready to try a whole new adventure in your kitchen! Your body, family and wallet will thank you later.

Likes/Dislikes: I’ve never reviewed a cookbook before so I really wanted to try at least one recipe out of this book before writing my review. However, due to budgeting, time constraints and quite honestly forgetting to pick out a recipe, I haven’t gotten around to it yet. I’ve been eying some delicious looking ones such as Almond Waffles with Raspberry-Basil Sauce, Smashed Sardines on Crackers, Chocolate Dipped Popcorn and Tilapia in Caper-Tomato Sauce. I’m not a vegetarian or a participant in the popular gluten-free bandwagon {I also have my own opinions about that but that’s for another post}, so I skipped most of the veggie main dishes and mentally added more meat to other dishes. One thing that really bothered me was that the author uses a lot of canola oil which is a very unhealthy oil for you. I’d go with olive oil instead. I really enjoyed the photos and recipe blueprints.

Rating:  PG-all ages. Recommended for everyone.

Date Review Written: June 4th, 2015.


I received this book free from Blogging for Books in exchange for an honest review. I wasn’t required to write a positive review and the opinions expressed in the above review are my own.

Tuesday, May 3, 2011

100th Post and Recipe!

Guess what? This is my 100th post! Way cool; let's party!!! :D

Okay, that's enough. Now, seeing as how summer {ugh, not my favorite season!} is just around the corner, folks are gonna be out barbecuing more often and one of the more popular side-dishes for anything barbecued {aside from watermelon} is potato salad, I'm gonna give you the recipe for my famous potato salad! See, aren't I nice? ;)

What you will need:
12 to 16 good sized red potatoes. Brown potatoes will work too but they tend to fall apart during the cooking process. You can also vary the amount of spuds; my family is rather large and everyone has large appetites so. . . :)
3 to 6 hard boiled eggs.
1 tub of sour cream {trust me on this one}.
2 sticks of celery, minced {or at least chopped into small pieces}.
1/2 red onion, finely chopped.
1 large pickle or 6 small pickles {depending on how much you like pickles that is}.

Now, the above ingredients are the basics. The ingredients below are optional; actually, everything aside from the first three items are optional.

1 can of black or green olives.
12 to 24 pickled green olives {you know, those things sitting at the bottom of your martini glass?}
1 carrot, finely chopped.
1/3 to 1/2 cup of pickled peppers or fresh peppers {the equivalent of one half of a bell pepper}, chopped of course.
I suppose you could put mushrooms in it but I never have.
Some apple cider vinegar {I'll explain in a minute}.
Salt and black pepper.

Step 1: Gently scrub the potatoes; red potatoes have a thinner skin than brown potatoes so you don't need to peel them. Besides, the skin is the healthy part of the spud anyway. Tip: to eliminate any bitter flavors, scrub out or remove the eyes on the spuds. Place the clean potatoes in a pot of boiling water {add a dash of salt to the water before you stick the spuds in for flavor} and boil until a fork is easily inserted into the middle of the potato. Remove, drain, rinse under cold water and let cool while you get the eggs boiling.

Step 2: While the spuds cool and the eggs slowly boil {which they should do for about fifteen to twenty minutes or so}, get out a sharp chopping knife, a cutting board and a large bowl {like, very large!}. Chop up the celery, carrot and onion first; put these into the bowl and then pour a little of the vinegar over them. This is a trick I learned from my mom: the celery and other veggies will soak up the vinegar and when you eat them later, they'll be more flavorful. Okay, once those are in, chop up and add in the olives, peppers, pickles and such.

Step 3: The eggs should be finished boiling about now so drain and rinse them with cold water before you move onto the potatoes, which you will chop up and add to the vegetables. Peel the eggs {I advised rinsing them off once after you've gotten rid of the shells} and then either chop into small pieces or use one of those handy-dandy things that slice the eggs with wire. What are those things called anyway?? Well, when you've all the ingredients, sprinkle with salt and pepper then dump the entire tub of sour cream into the mix and thoroughly combine the ingredients. Add a dash of salt and pepper to your tastes and serve with the rest of the meal.

See, wasn't that easy? :) Typically takes two to three hours from start {scrubbing the spuds} to finish {adding in the sour cream}, and serves oh, ten people depending on how much you actually made. A sixteen-potato salad typically serves my family of seven for two days after the main meal it was made for. We often have leftovers for breakfast and lunch around my house. ;) Enjoy!!

Thursday, December 2, 2010

Pumpkin Bars Recipe.

With the return of snow and lots of time indoors {which can sometimes be pretty interesting around here but more on that some other time}, comes the return of favorite family recipes; I just made this recipe for the first time yesterday and it was an instant hit. ;)

What you will need:
2 cups all-purpose flour
1 1/2 cups sugar
2 teaspoons baking powder
2 teaspoons ground cinnamon
1 teaspoon baking soda
1/4 teaspoon salt {I personally put two in because we love salt so much}
1/4 teaspoon ground cloves
4 eggs, beaten
1 15-ounce can pumpkin
1 cup cooking oil {I used saffola oil}
1/2 recipe Cream Cheese Frosting {remind me to post that please}

The Directions:
1. In a bowl stir together the flour, sugar, baking powder, cinnamon, baking soda, salt, and cloves. Stir in the eggs, pumpkin, and oil until combined. Spread batter into an ungreased 15x10x1-inch baking pan.

2. Bake at 350 degrees for 25 to 30 minutes or until a wooden toothpick inserted near the center comes out clean {we don't currently have any toothpicks so I used a butter knife ;)}. Cool in pan on a wire rack for 2 hours {yes, your siblings will be going nuts by the time the two hours are up so I recommend a movie or some long-term distraction for this stage}. Spread with Cream Cheese Frosting and cut into bars. Enjoy!

Prep: 35 minutes {I didn't time myself}. Bake: 25-30 minutes. Oven: 350 degrees. Cool: 2 hours. Makes: about 48 bars, though I doubt ours was properly divided. ;)

The cookbook has an applesauce variation you might like: simply substitute the pumpkin for one 15-ounce jar of applesauce. :)

Saturday, June 19, 2010

Recipes.

Once again, I find that I have been too busy this week to write a new book review for you {I should really put mom's suggestion to use and write big batches of them so I'll have some on hold for weeks like this} so I'm giving you some handy and frequently used recipes that can be found pined to the wall in our kitchen. :)

Honey and Vinegar.
A morning {usually} homemade prevention medicine, this is easy to make and very healthy.

I capful vinegar {any kind will do I think but we use apple cider vinegar}
I spoon honey
3 drops hot sauce
I slice of garlic
2 to 3 drops of mustard {or whatever my brother puts in his}

Stir it up with the end of a spoon and pretend you're in a John Wayne western!

Cream Cheese Icing.
We use this on all our cakes and it's great! My sister makes it so well!!

Half box of powdered sugar
2 boxes cream cheese
2 teaspoons maple extract {or vanilla}
1/4 cup honey

Beat it together in the mixer or with a hand-held mixer until blended and rather thick then slap it on the cake and ignore all the spoons that dip in for a taste behind your back. ;)

Chocolate Covered Raisins.
A recent hit with my family, this recipe is way flexible in it's ingredients.

1 bag of chocolate chips {real chocolate mind you and use 2 bags if you've a chocolate loving family}
Roughly a cup or so of raisins
Additional things to throw in and make different combinations of are dried cherries, walnuts, pecans, cashews, sliced almonds, peanuts, coconut and other dried fruits.

In a double-boiler {I think that's what it's called}, melt the chocolate till smooth, throw in the ingredients, stir till combined, turn the heat to low {to keep the chocolate warm} and use two spoons to drop rounded mounds of chocolate onto a cookie sheet lined with wax paper or parchment. Stick in the fridge for a couple hours or the freezer for fifteen to thirty minutes then bag the goodies, they'll be solid the next day and won't melt in your fingers immediately like they do when you're bagging them. Enjoy!

Saturday, June 12, 2010

Coconut Macaroons.

These are Dad's favorite cookies and from the speed at which they disappeared when I made them, his family shares his taste! :)

2 2/3 cups flaked coconut {seven ounces}
2/3 cup sugar
1/3 cup all-purpose flour
1/4 teaspoon salt
3 egg whites
1/2 teaspoon vanilla or 1/4 teaspoon almond extract
4 ounces semisweet chocolate {optional}
1 teaspoon shortening {optional}

Preheat the oven to 325 degrees and lightly grease and floor a cookie sheet {we used two and lined them with parchment paper}, set aside. In a mixing bowl, combine coconut, sugar, flour and salt, stir in the egg whites and vanilla then drop the mixture {it'll be rather sticky so don't use your hands} by rounded teaspoons two inches apart onto the prepared cookie sheet and bake for 20 to 25 minutes or until edges are light brown then transfer them to a a wire rack and let cool. If desired, melt chocolate and shortening in a small saucepan over low heat, stirring often, then dip the bottoms of the cookies in the melted chocolate or drizzle over tops in a crisscross pattern, let the chocolate cool and then enjoy!
I used a bag of chocolate chips with no shortening and threw a bunch of raisins into the leftover chocolate to make clusters {which rapidly disappeared also} and though it says it makes about thirty cookies, I doubled the recipe and got thirty-four. Interesting. Take note that the chocolate will be hot so your fingers might get burned, or at least, overheated. ;)

Saturday, March 6, 2010

Chocolate-Buttermilk Brownies.

Seeing as how I've been busy this week trying to meet a deadline and get some school done, I haven't had time to scan the bookshelves and write a review so I'm gonna post another favorite family recipe that we made a couple weeks ago {and which of course didn't last very long}. What you'll need to make the brownies is as follows {note: we doubled the batch when we made it}.

2 cups all-purpose flour {you can also use say, half a cup of whole wheat flour and make the rest all-purpose, it's healthier that way}.
2 cups sugar {we like less but whatever}.
1 teaspoon baking soda.
1/4 teaspoon salt.
1 cup butter.
1/3 cup unsweetened cocoa powder.
2 eggs.
1 cup water.
1/2 cup buttermilk {or sour milk if you know how to make it}.
1 1/2 teaspoons vanilla.
1 recipe Chocolate-Buttermilk Frosting {which we didn't use, instead we used the Butterscotch Sauce recipe which worked well, we had to use up the leftovers of it anyway! :)}.
1 to 2 cups semi-sweet chocolate chips {optional}.
1 to 2 cups chopped walnuts {optional}. These last two aren't called for in the recipe but we added them anyway and they made the brownies very good.

The first thing you want to do is preheat the oven to 350 degrees {unless yours is broken like ours or you'd prefer wanting till the last ten minutes of mixing to turn it on like we do} then grease either a 15x10x1-inch baking pan or a 13x9x2-inch baking pan and set those aside. In a medium size mixing bowl stir together the flour, sugar, baking soda and salt then set that aside too; in a medium saucepan combine butter, cocoa powder, and the cup of water. Bring mixture just to broiling, stirring constantly then remove from heat and add the cocoa mixture to the flour mixture, beat with an electric mixer on medium to high speed until thoroughly combined. Add eggs, buttermilk, and vanilla then beat for one minute {or until it looks well mixed}, add the chocolate chips and walnuts which you also want to mix in for about a minute. Note: the batter will be thin {translation: don't panic! ;)}; pour the batter into the prepared pan and bake it {about 25 minutes for the 15x10x1-inch pan and/or 35 minutes for the 13x9x2-inch pan or until a wooden toothpick inserted in the middle comes out clean, just don't hit a chocolate chip!}. The last thing you want to do is pour the warm Chocolate-Buttermilk Frosting {or whatever topping you happen to decide upon} over the brownies, spreading evenly; the brownies have to cool in the pan on a wire rack for about an hour {think about what happens to a hot cake when it gets cut open too soon!} then cut into bars and enjoy! :)

Saturday, February 6, 2010

Chocolate Revel Bars.

To make our family favorite treat, follow the recipe below. :)

3 cups rolled oats.
2 1/2 cups all-purpose flour.
1 teaspoon baking soda.
1 teaspoon salt.
1 cup butter {we never use margarine but you can}.
2 cups brown sugar {downsize half a cup or more if that's too much, we usually do}.
2 eggs.
4 teaspoons vanilla extract.
1 14-ounce {1 1/3 cups} sweetened condensed milk {now you know why we downsize the sugar}.
1 1/2 cups semi-sweet chocolate pieces {known as chips at our house}.
2 tablespoons butter.
1/2 cup chopped walnuts {we sometimes don't have these on hand}.

Now there are two ways to make this: you can make it like the recipe says or you can make it like a cookie which is how I tend to make everything {DON'T make a cake like a cookie, it doesn't turn out right}. The recipe says to combine the dry ingredients {oats, flour, soda and salt} into a bowl while in a different bowl beat the cup of butter for 30 seconds then add the eggs and 2 teaspoons of vanilla, beat well. Stir in the dry stuff and mix till combined then in a saucepan heat together the condensed milk, the chocolate, 2 tablespoons butter and half a teaspoon over low heat, stirring till smooth then remove form the heat and add in the walnuts and remaining 2 teaspoons of vanilla. Right about here is when we turn our oven on at 350 degrees {remember to check it for lost toys and packages of sugar set in there to dry out}. Pat two thirds of the oat mixture into the bottom of an ungreased 15x10x1-inch baking pan {or the biggest you got, also try sticking a piece of parchment paper down, works great!} then spread the chocolate mixture over that and dot remaining oat mixture over that {its not suppose to cover all the chocolate up so don't panic}. Stick it in the warm oven for 25 to 30 minutes then cool on a wire rack and cut into bars {note: the oat mixture should be kinda golden-brown on top like a cookie when it's done}. The recipe says it makes 72 pieces but that's not the case at our house as it never gets cut evenly. Who's counting anyway? :) Enjoy!!
Note: If you use dark chocolate pieces then it'll be really chocolaty and it might not do to give any to younger siblings or children right before bedtime or in the mornings before breakfast. :)